Installing a high-speed PVC self-repairing zipper door follows a fixed order: assemble the frame on the ground, seat the curtain, mount the drive, then lift the whole door into the opening. Most of the work happens before the door leaves the ground.
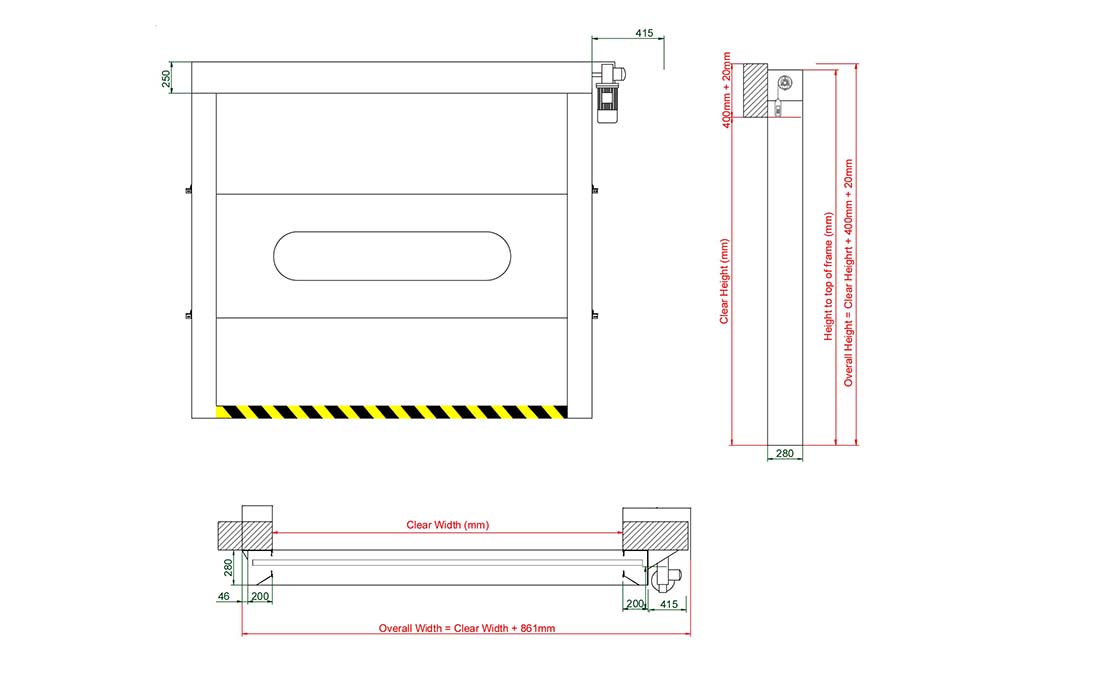
The steps below follow the standard installation order, with the tools and safety notes that apply.
Installation Steps
Step 1: Pre-Assemble the Shaft Box and Side Guides
Put the shaft box and both steel side guides on horizontal ground, and fix the side guides to the shaft box with screw bolts. This builds the frame the rest of the door hangs from.
Step 2: Assemble the PVC Curtain
This is the step that takes the most care. Unpack the pre-assembled PVC curtain, which arrives already rolled on the tube shaft, and insert the shaft into the top box. With the side frames clamped, remove the bearing-plate bolts so the frames can adjust, then align the zipper edge into the track on both sides.
Adjust the side frames inward if needed, then loosen the top clamp and slide the side frames outward to lightly stretch the curtain. The curtain should be lightly stretched — not too tight. A curtain that is over-tightened will fight the drive on every cycle, and one that is too loose will sag in the guides.
Step 3: Mount the Motor Drive and Encoder
Fix the motor on the shaft and make sure the screws are well-tightened. Insert the encoder on the shaft head, and fix the encoder bracket with the speed reducer on the motor.
Step 4: Fit the Frame to the Opening
Use a crane or forklift to lift the whole assembled door frame, then fix it to the concrete opening after checking the measurements. This is the point where the door leaves the ground, so confirm the frame is square and level before tightening it down.

Step 5: Fix the Cover Box
Fit the cover box, including both the motor cover box and the shaft cover box.
Step 6: Mount the Infrared Sensor
Mount the infrared receiver and transmitter on both sides of the opening, making sure they are on the same horizontal level.
Step 7: Fix the Safety Airbag Sensor and Extras
Attach the safety airbag sensor and any other extra options. After everything is mounted, run a test cycle and confirm the door opens, closes, and reverses on the safety edge.

Equipment Needed
- Grinder, scissors, pliers, hammer, clamps
- Drill bits, cordless drill, 3/8-inch concrete drill bit, hammer drill
- Caulk gun, tape measure, wire stripper
- Allen keys in 3 mm, 5 mm, and 8 mm
- Suitable lifting equipment for the assembled frame (ladder, forklift, or man lift)
- Tools to install the wall fasteners for your specific wall
Safety Notes
- Before any service, personnel must be properly trained and qualified to work on the equipment.
- Working on electrical equipment requires special training and certification.
- Before any electrical work, turn off, lock, and tag out the power to the door.
- Block off the area from traffic and place signs indicating the door is out of operation.
- Unauthorized people must not repair or maintain the door and should not be in the area during maintenance.
- Do not use heat sources that could start fires near the door, and do not solder during maintenance.
- Do not use compressed air or solvents on the door.
;border-radius:8px;padding:28px 32px;margin:32px 0;”>
Get installation support and drawings
RAX ships every high-speed door with an English installation manual, CAD drawings, and a wiring diagram. Send your opening dimensions for a quote and full documentation.
Whatever the choice, the door should carry CE marking to EN 13241, the product standard for industrial doors and gates.
FAQ
How long does it take to install a high-speed PVC zipper door?
For a trained two-person crew, a standard opening installs in roughly half a day after the frame is pre-assembled on the ground.
How do I know the door is installed correctly?
A correctly installed door tracks straight without rubbing, the zipper bead stays fully seated through a full cycle, and the door reverses on the safety edge when the beam is blocked.
Can the door be installed by my own maintenance team?
Yes, with the manual and drawings, provided electrical work is done by certified personnel.
What is the most common installation mistake?
Over-tightening the curtain in Step 2. The curtain should be lightly stretched, not tight — a curtain that is too tight will fight the drive on every cycle.